
1. Print at Actual size / 100% and check the ruler
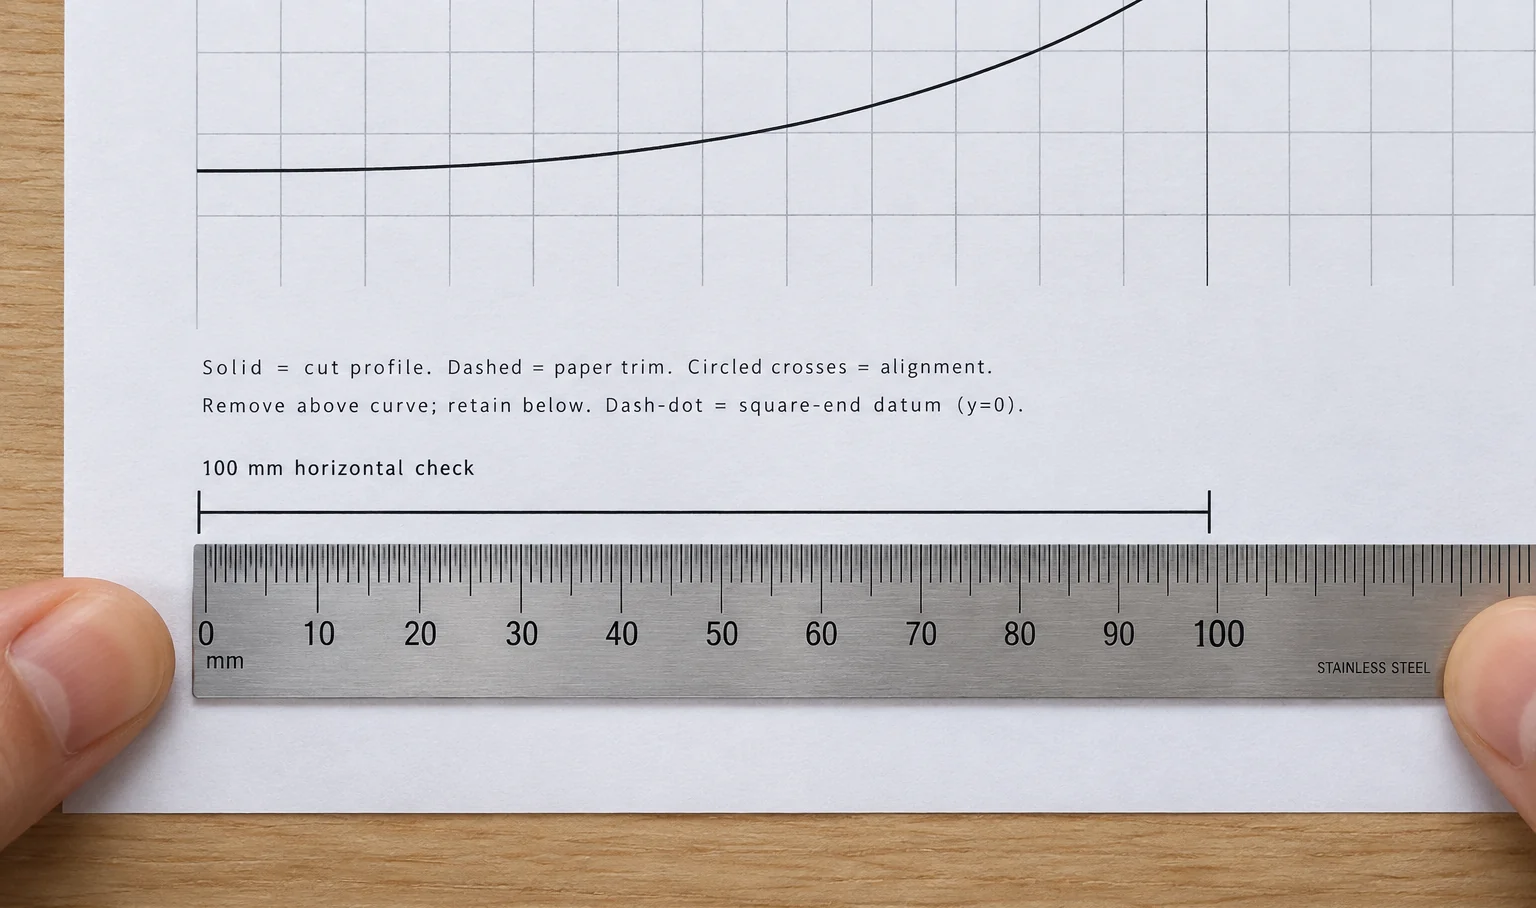
Choose the same A4, Letter, A3 or Tabloid size in the calculator and the print dialog. Print all pages from one exported file. A3 and Tabloid can reduce joins, but only when your printer supports them.
In the PDF viewer choose Actual size or 100%. Disable Fit, Shrink oversized pages, multiple pages per sheet and a second poster-tiling operation. Print single-sided so every tile remains available for assembly.
Measure between the endpoint marks: the horizontal reference is 100 mm and the vertical reference is 20 mm. Check every sheet you will use. If either direction is wrong, correct the print setup and print again; do not stretch paper to compensate.
2. Arrange the pages by their large page numbers
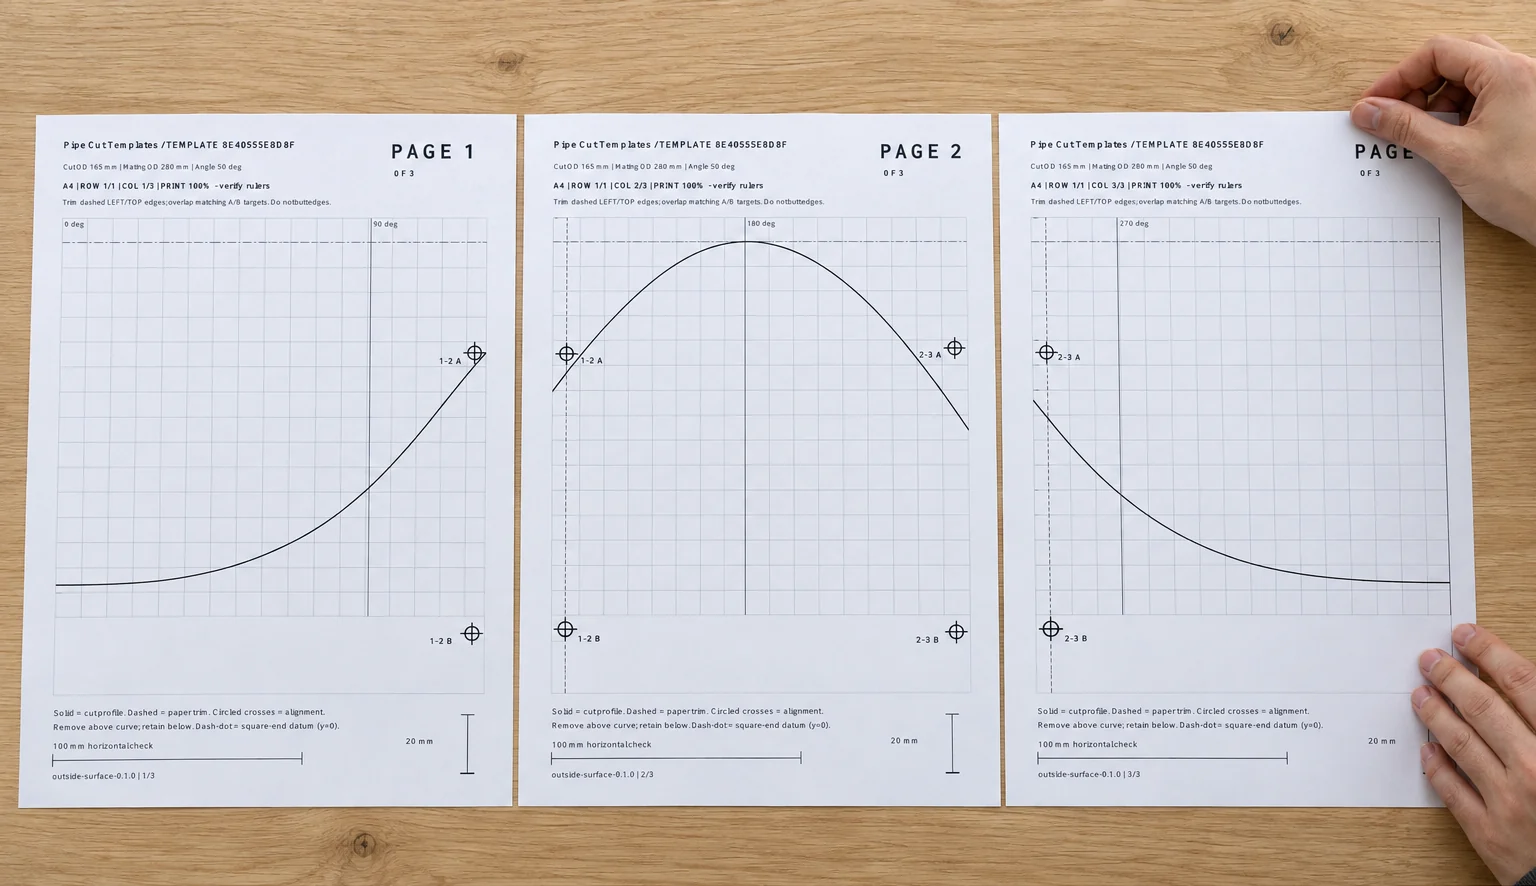
Lay out pages left to right, then top to bottom. Use the large page numbers, ROW/COL labels and the on-screen page layout. Confirm the same template code and paper size on every sheet.
A single-page template has no paper joins. Do not change measured tube dimensions merely to reduce the sheet count; that would change the template.
3. Trim only the indicated edge
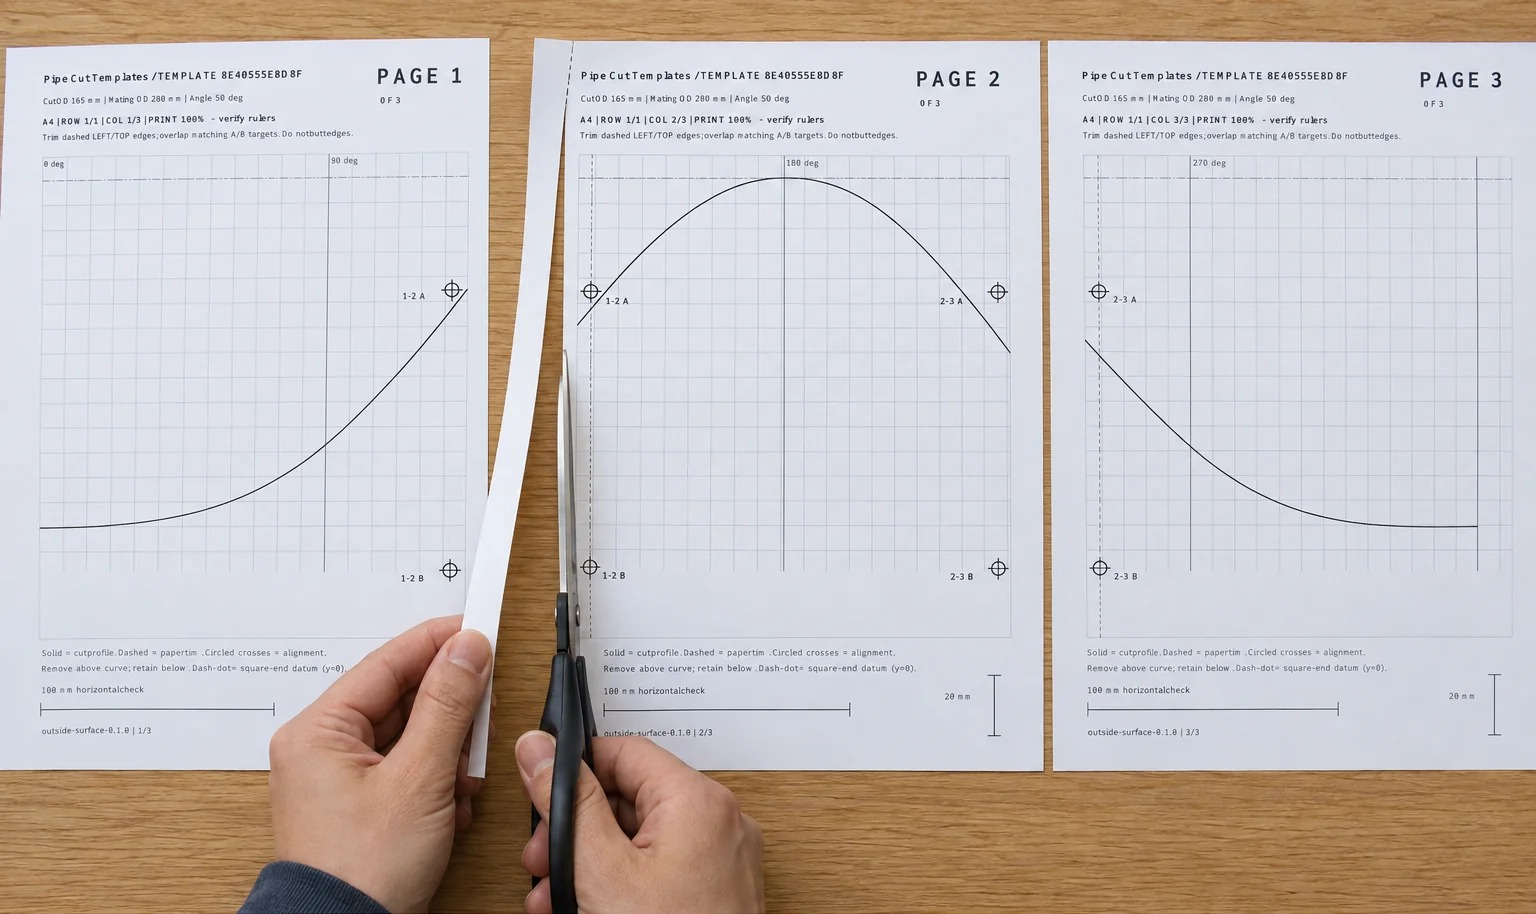
On a sheet with a left or top neighbour, trim along the dashed line through the alignment-target centres on that edge. Keep outer edges untrimmed where there is no neighbour.
The area beyond the trim line repeats content from the preceding sheet. Cutting it prepares an overlap; it does not shorten the intended developed pattern.
4. Overlap and align both A/B targets

Overlay the trimmed edge on its neighbour. A mark labelled 1-2 A matches 1-2 A; also match 1-2 B to 1-2 B. Matching both targets helps prevent rotation. Use the same process for vertical joins.
Do not butt paper edges together, and do not discard a portion of the assembled curve because it appears in the overlap. Circled crosses are registration targets, not cut lines.
5. Tape the aligned seams and check continuity
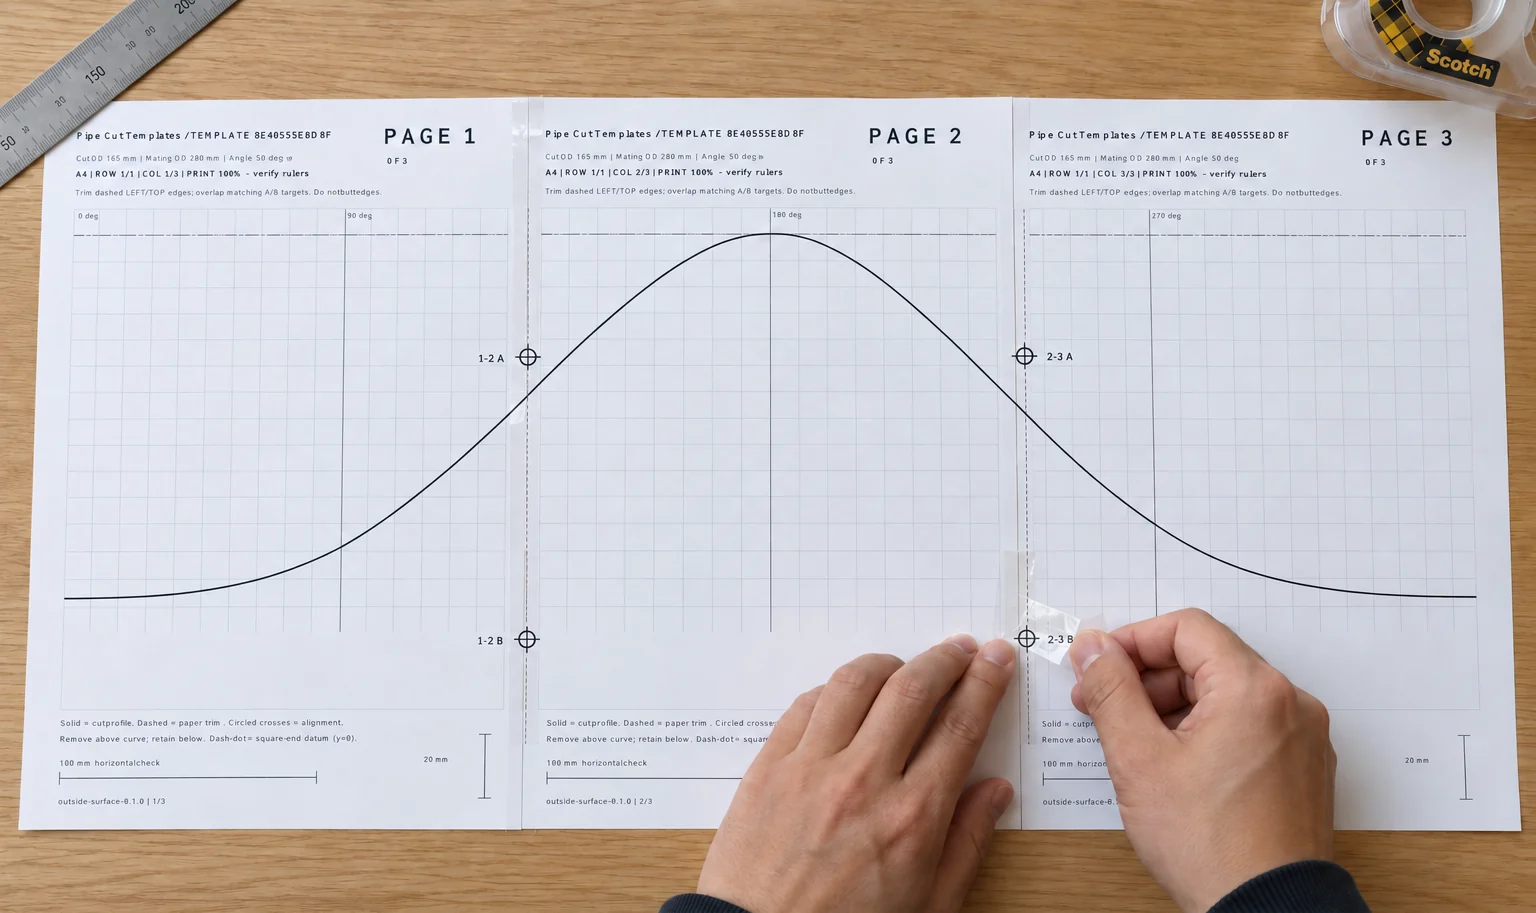
Hold both matching targets in place and tape the seam without moving them. Recheck the adjacent curve and grid before moving on.
Paper-page overlap is not extra circumference to add at the template’s tube seam. The printed references, rather than blank paper margins, define the layout.
6. Cut the paper along the solid profile
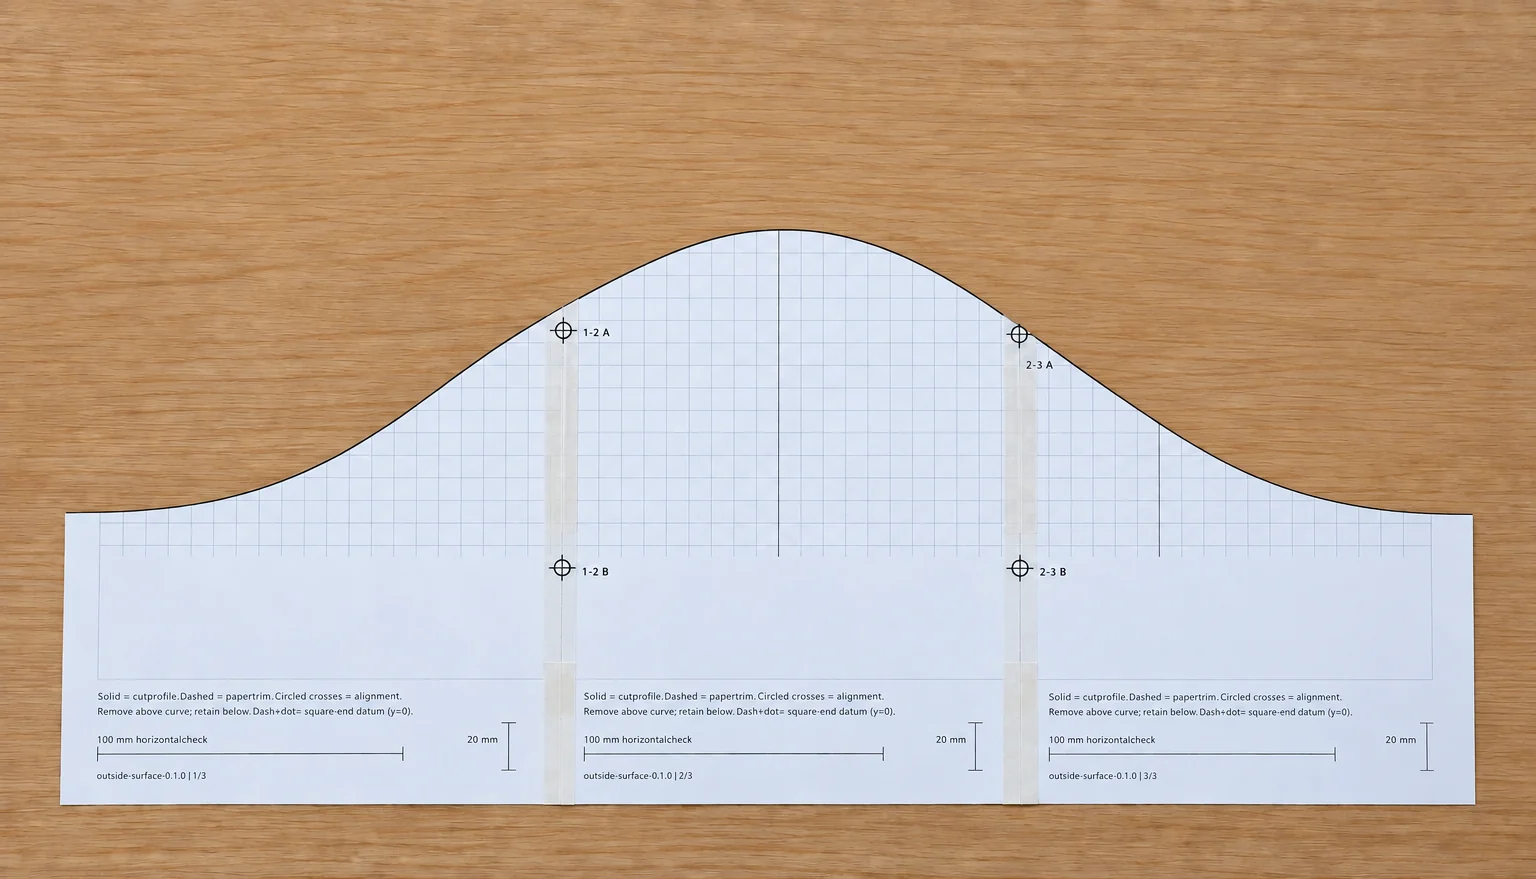
Cut along the solid curve. The printed instructions identify the paper region above the curve as the portion to remove and the region below as the portion to retain. Dashed lines and circled targets are for paper assembly only.
This step produces a paper layout aid. It does not verify cutting accuracy, wall-thickness compensation, bevel, weld gap or kerf.
7. Wrap the assembled pattern around the tube
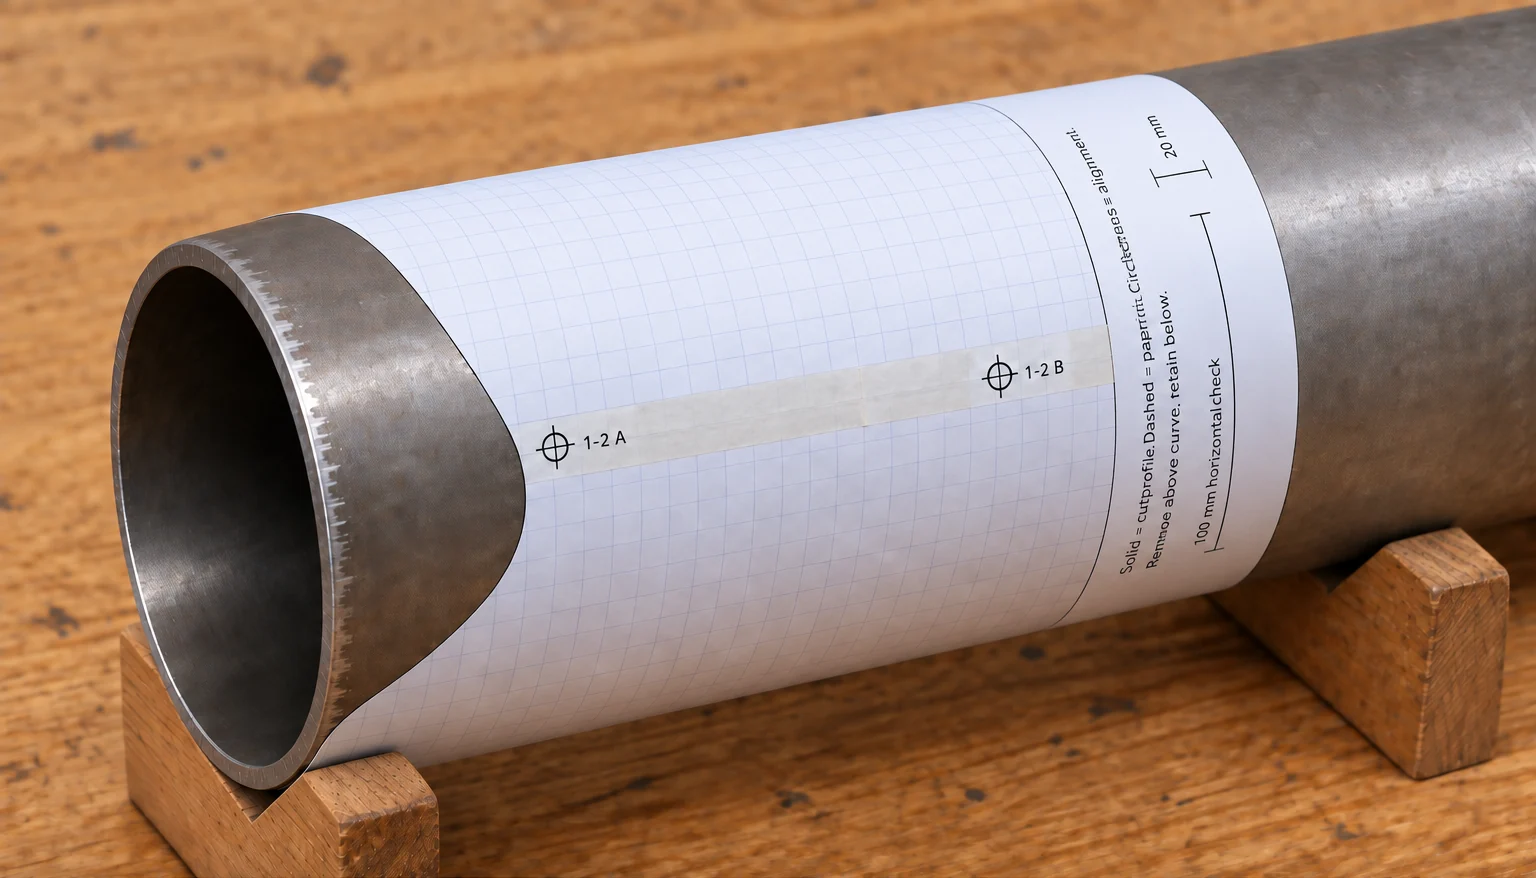
Wrap the pattern square to the tube axis and bring its printed seam references together on one axial generator. Keep the dash-dot square-end datum visible and avoid stretching, bubbles or folds.
Before production, use the requirements of your fabrication process and confirm the result on a suitable test piece. The template describes outside-surface geometry without wall-thickness, weld-gap, bevel or kerf compensation.
If something does not line up
Rulers are short or long: check scaling and paper size. Targets align but the curve jumps: verify all sheets came from the same file and share the template code, then check their order. Paper wraps at an angle: recheck the printed seam references and tube-axis alignment.
Template circumference differs from the tube: check actual OD versus nominal size and input units. A code match confirms the same layout parameters; it does not replace measuring the printed scale.